⚡ Key Takeaways
- The slit lamp retina exam uses an indirect condensing lens (90D, 78D, etc.) to visualize the fundus
- The image is inverted and reversed — learn to navigate intuitively
- Use a systematic approach: disc → macula → vessels → periphery
- Maximum pupil dilation dramatically improves your view
- The slit beam helps assess elevation of retinal lesions
Watch the Full Video
Why Slit Lamp Fundoscopy?
While direct ophthalmoscopy shows you a small, magnified view, the slit lamp with an indirect lens provides a wider field, stereoscopic view with adjustable illumination. It's the standard way ophthalmologists examine the retina in clinic. Mastering this technique is essential for every resident.
Setting Up
- Dilate the pupil — tropicamide 1% ± phenylephrine 2.5%
- Set the slit lamp to a moderate-width beam
- Dim the room lights for better contrast
- Hold the lens approximately 1-2 cm from the cornea
- Use your non-dominant hand for the lens and dominant hand for the slit lamp joystick
The Technique
Finding the Reflex
Start by looking through the slit lamp eyepieces, holding the lens in front of the dilated pupil. You'll see a bright orange reflex. Slowly adjust the distance and angle until the retina comes into focus. This is the hardest part — be patient.
The Image Is Inverted
Remember: the indirect lens creates an inverted and laterally reversed image. To look superiorly on the retina, move the slit lamp down. To look nasally, move the slit lamp temporally. This becomes intuitive with practice.
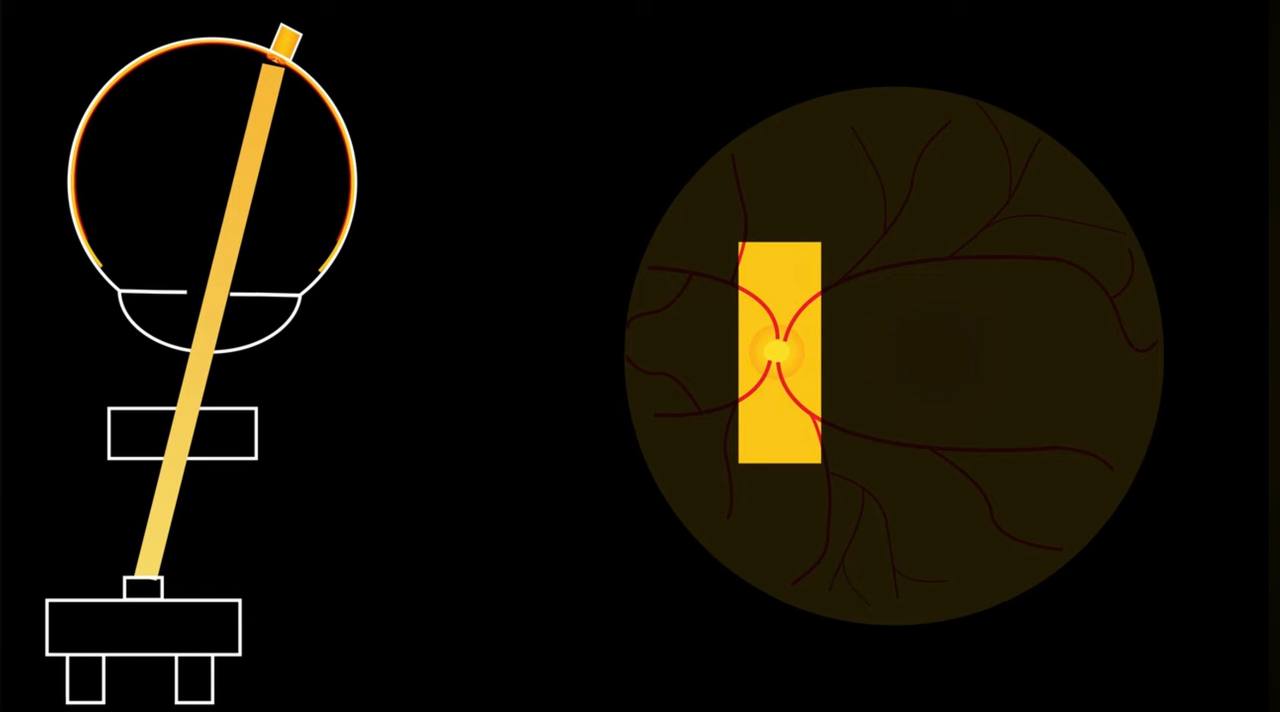
Alignment of slit lamp beam, condensing lens, and eye to visualize the optic nerve — and the resulting fundus view on the right.
Systematic Exam
- Optic disc — assess color, cup-to-disc ratio, margins, neovascularization.
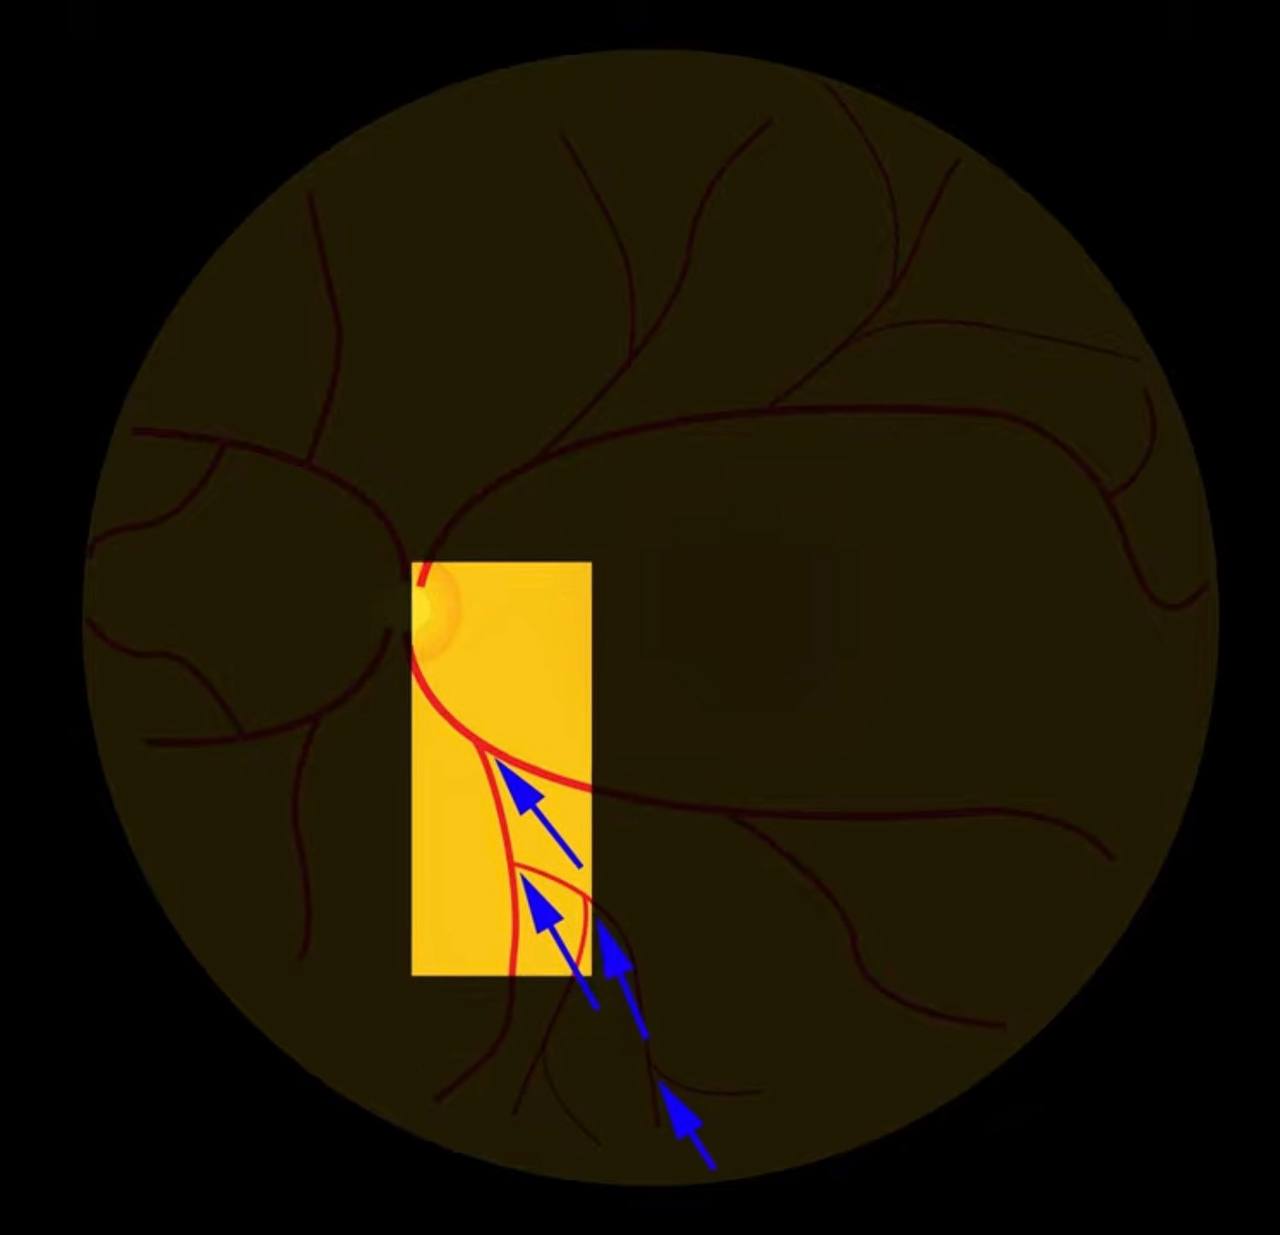
Tip: follow the vessel branching points — they act as arrows pointing toward the optic disc.
- Macula — look for edema, drusen, hemorrhage, holes
- Vessels — follow arterioles and venules, check for crossings, caliber changes
- Periphery — have the patient look in all directions; use the slit beam to check for tears, detachments, or lattice degeneration
Using the Slit Beam
Narrow the slit to assess retinal elevation. The slit beam bends over raised lesions — this is how you detect subtle retinal detachments, disc edema, or elevated tumors.
Frequently Asked Questions
Which lens should I use — 78D or 90D?
The 90D gives a wider field of view with slightly less magnification. The 78D offers more magnification but a narrower field. For general fundus exam, start with the 90D. Use the 78D when you need more detail on a specific area.
Do I need to dilate for every fundus exam?
Not always, but dilation dramatically improves your view, especially of the periphery. For a comprehensive retina exam, always dilate. Undilated exams are limited to the central posterior pole.
How do I practice this skill?
Build a DIY practice eye or use Pocket Retina cubes. Practice on colleagues. The key is repetition — the lens handling becomes natural after dozens of exams.
Why can't I find the reflex?
Common reasons: lens too far or too close, angle wrong, pupil too small, room too bright, or slit beam too narrow. Start with a wide beam and gradually narrow it once you have a good view.
Want to practice your fundus exam?
Build a DIY eye model, learn about choosing your first Volk lens, or explore the stereo variator technique.